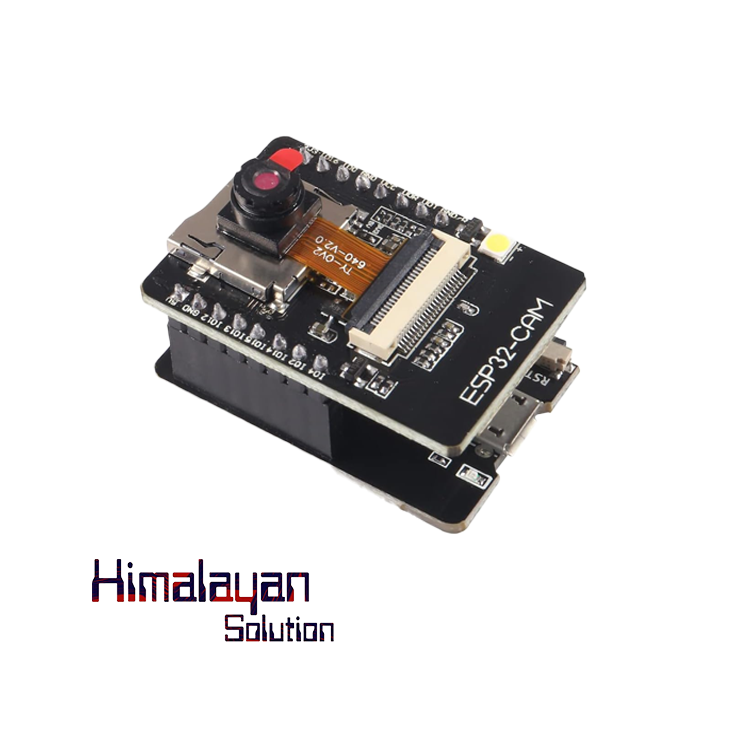
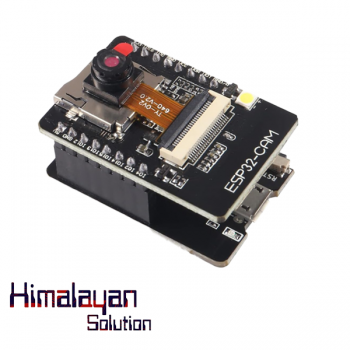

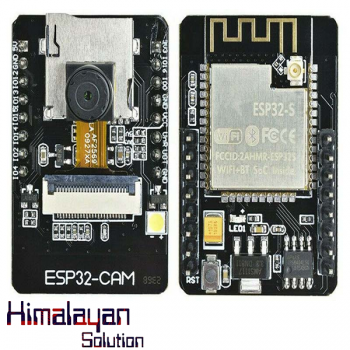
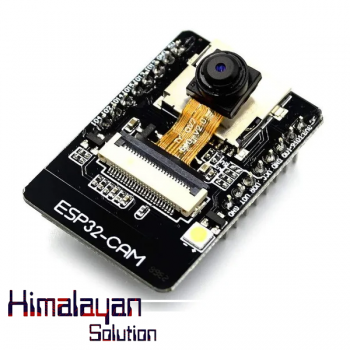
ESP32 CAM Development Board with OV2640 Camera | Wi-Fi & Bluetooth Module
The ESP32-CAM-MB is an improved version of the ESP32-CAM with a USB-to-serial CH340G adapter, making programming much easier since it does not require an external FTDI module. The ESP32-CAM is a small, low-cost development board that integrates an ESP32-S microcontroller with a camera module, making it ideal for image processing, video streaming, and IoT applications. Here are its key features and specifications:
- The smallest 802.11b/g/n Wi-Fi BT SoC module.
- Low power 32-bit CPU, can also serve the application processor.
- Up to 160MHz clock speed, summary computing power up to 600 DMIPS.
- Built-in 520 KB SRAM, external 4MPSRAM.
- Supports UART/SPI/I2C/PWM/ADC/DAC.
- Support OV2640 and OV7670 cameras, built-in flash lamp.
- Support image WiFI upload.
- Supports TF card.
- Supports multiple sleep modes.
- Embedded FreeRTOS.
- Supports STA/AP/STA+AP operation mode.
Availability: In Stock
| Processor: | Xtensa® 32-bit dual-core, 240 MHz |
| Wireless: | 2.4 GHz Wi-Fi, Bluetooth 4.2, BLE |
| Flash | 32Mbit by default |
| RAM | Internal 520KB + External 4 M P |
| Bluetooth | Bluetooth 4.2BR/EDR and BLE standards |
| Support TF Card Maximum Support | 4G |
| Interfaces: | GPIO, UART, SPI, I2C, microSD support |
| Input Voltage | 5V (via USB-C or Micro-USB) |
| Camera: | 2MP OV2640, JPEG encoding |
Programming the ESP32 CAM Board:
Note: You need to connect IO0 and GND by soldering (jumper wires or a separate switch) before connecting the module to the computer for the code to upload successfully.
1. Required Components
- ESP32-CAM-MB module (with CH340G USB-to-serial)
- USB-C or Micro-USB cable (depending on your board version)
- Arduino IDE (or ESP-IDF)
2. Install CH340G USB Driver (If Needed)
- Download and install the CH340G driver for Windows/Mac/Linux if the board is not detected.
- Download CH340 Driver
- Check the COM port in Device Manager (Windows) or
ls /dev/ttyUSB*(Linux/Mac).
3. Install ESP32 Board Support in Arduino IDE
- Open Arduino IDE.
- Go to File → Preferences.
- In "Additional Board Manager URLs", add:
https://dl.espressif.com/dl/package_esp32_index.json - Click OK, then go to Tools → Board → Boards Manager.
- Search for ESP32 by Espressif Systems and install it.
4. Select the Board & Port
- Go to Tools → Board → Select "AI-Thinker ESP32-CAM".
- Set Upload Speed to 115200.
- Select the correct COM Port (e.g., COM3/COM4 on Windows or
/dev/ttyUSB0on Linux).
5. Upload Example Code
- Open File → Examples → ESP32 → Camera → CameraWebServer.
- Modify the camera model in
camera_pins.h:#define CAMERA_MODEL_AI_THINKER // Uncomment this for ESP32-CAM-MB - Click Upload.
Tip: If the upload fails, press and hold the RST (Reset) button while clicking Upload.
- Be the first to review this product
WRITE YOUR OWN REVIEW
How do you rate this product? *